Why Google Maps Matters More Than Any Other Directory
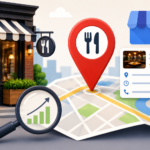
Google Maps is not just a navigation app. It is where diners decide where to eat. According to a 2024 Toast survey, 19% of people discover new restaurants specifically through Google Search and Maps – more than through Yelp, Instagram, or word of mouth. A separate survey found that 62% of restaurant customers use Google to search before choosing a spot.
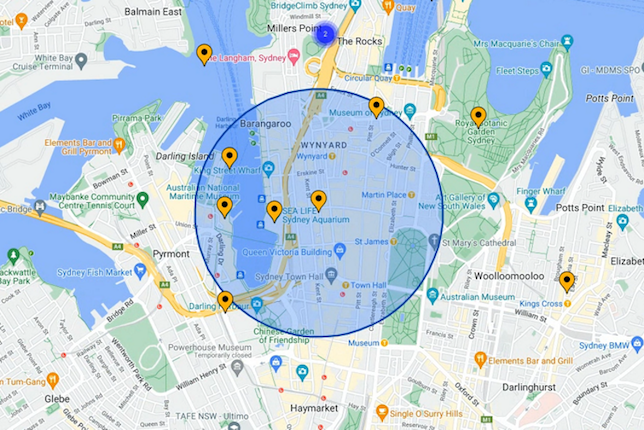
The math is simple. Restaurants with complete, verified Google Business Profiles get an average of 7x more clicks than profiles with missing information. Restaurants with 100 or more photos receive 520% more calls than the average listing. The local pack – those three results that appear with a map at the top of Google – captures the majority of clicks for searches like “best pizza near me” or “seafood restaurant in Miami.”
If your restaurant is not there, someone else’s is.
Step-by-Step: How to Get Your Restaurant on Google Maps
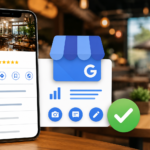
Step 1 – Go to Google Business Profile
Open your browser and go to business.google.com. Sign in with the Google account you want permanently linked to your restaurant. Use a business email if you have one – avoid logging in with a personal Gmail that an employee might lose access to.
Step 2 – Search for Your Restaurant Name First
Before creating a new listing, type your restaurant’s exact name into the search bar on the dashboard. Google may already have a listing for your restaurant based on data it collected automatically. If a listing exists, click “Claim this business” – do not create a duplicate. Duplicate listings cause ranking problems that are painful to untangle later.
If nothing comes up, click “Add your business to Google” to start fresh.
Step 3 – Select Your Business Category
Your primary category should be “Restaurant”. Then add secondary categories that match your specific cuisine: “Mexican Restaurant,” “Sushi Restaurant,” “Seafood Restaurant,” and so on. This step is more important than most owners realize. Category selection determines which searches trigger your listing. A steakhouse that only has “Restaurant” as its category will lose searches like “steakhouse near me” to a competitor who got this right.
Step 4 – Enter Your Business Name and Address
Use your restaurant’s name exactly as it appears on your signage and on your website. Do not add keywords into your business name (e.g., “Joe’s Pizza – Best Pizza in Miami”) – Google’s guidelines prohibit this and it can get your listing suspended.
Enter your address carefully. This is where Google will send your verification postcard. Once you enter the address, check that the map pin lands on the right spot. If you are in a plaza or a building with multiple units, zoom in and drag the pin to your exact door.
Step 5 – Add Your Phone Number, Website, and Menu URL
Enter the phone number customers should call for reservations, orders, or questions. Add your website URL. In the Menu URL field, link directly to your online menu page – not just your homepage. These fields drive action: diners who find your listing will click to call or navigate to your menu within seconds of seeing it.
Step 6 – Set Accurate Hours for Every Day
Enter open and close times for each day of the week. Use the Special hours feature to flag holiday closures, extended brunch hours on weekends, or seasonal breaks. Incorrect hours are the single most common cause of negative reviews that say “showed up and they were closed.” One wrong closing time can cost you an entire dinner rush.
Step 7 – Verify Your Listing
Google requires verification to confirm you are the legitimate owner of the business. Most restaurants verify by postcard, which arrives in 5–7 business days. Some accounts qualify for phone, email, or video call verification, which is faster.
When the postcard arrives, log back into your Google Business Profile dashboard and enter the 5-digit code. Do not skip this step – an unverified listing has limited visibility and anyone can suggest edits to it without your approval.
While you wait for the postcard, use the time to prepare your photos and write your description (Steps 8–9 below) so you can fill everything in the moment the listing goes live.
Step 8 – Write a Business Description That Actually Converts
Google gives you 750 characters. Use them. Describe your cuisine style, your atmosphere, what makes your restaurant worth visiting, and any recognitions or signature dishes. Be specific: “award-winning stone-crab claws” lands better than “great seafood.” Write for the diner reading it on their phone, not for an algorithm.
Avoid generic phrases like “best food in the city” or “excellent service” – every restaurant says that. Tell them something only your restaurant can say.
Step 9 – Upload High-Quality Photos
Photos are not optional – they are one of the most direct drivers of profile performance. At minimum, upload these at launch:
- Exterior photo (daytime and evening if possible)
- Interior photo showing the atmosphere
- 3–5 food shots of your most popular or visually striking dishes
- Team or kitchen photo (builds trust)
- Logo and cover image
Restaurants with 100+ photos on their Google Business Profile receive 520% more calls than the average listing. That number is not a typo. Commit to adding new photos at least once a month. Shoot on natural light when possible, and keep phones horizontal for the main shots.
Step 10 – Fill In Every Attribute
Under the More section of your profile, you will find attribute fields that most owners ignore. These matter. Check every option that applies to your restaurant:
- Service options: Dine-in, Takeout, Delivery, Curbside pickup
- Outdoor seating: yes or no
- Accessibility: wheelchair accessible entrance, restroom, parking
- Amenities: Wi-Fi, TV, reservations, live music
- Highlights: family-friendly, good for groups, romantic
- Payment: cash, cards, digital wallets
These attributes show up directly on your Maps listing and feed into filtered searches. If a diner searches “restaurants with outdoor seating in Brickell,” your listing only appears if that attribute is enabled.
Step 11 – Add Your Menu Directly Into the Profile
Google has a built-in menu editor. Use it. Add your menu sections (Appetizers, Entrees, Desserts, Drinks) and individual items with prices. Do not upload a PDF – Google cannot index PDFs for search, so that menu is invisible to the algorithm.
Menu items typed directly into your profile can appear in the Dishes panel that Google shows on some restaurant listings. A diner searching for “ceviche in Miami” can see your specific dish before they even click into your profile.
Step 12 – Enable Messaging and Monitor Q&A
Enable the Messages feature so diners can text your restaurant directly from Maps. According to local marketing research, 60% of mobile searchers prefer texting over calling. This feature captures customers in the decision moment – the one where they are choosing between you and the place next door.
Check the Q&A section of your listing weekly. Diners can post questions publicly, and if you do not answer, other users will – and their answers may be wrong. Answer every question clearly and promptly. Add the most common ones as pre-populated Q&As yourself (you can do this from your own listing).
Step 13 – Build Your Review Strategy From Day One
Reviews are the most powerful ranking factor in Google Maps local results. BrightLocal’s 2024 research found that restaurants in the top three Map results averaged 47 more reviews than those ranked fourth through tenth. Getting reviews requires a system, not luck.
Practical tactics that work:
- Add a QR code to your receipt that links directly to your Google review page
- Place a small table card near the exit with the QR code and a friendly ask
- Train your floor staff to mention reviews to guests who compliment the meal
- Text your review link to customers 30 minutes after a delivery order is delivered
Respond to every review – 5-star and 1-star alike – within 48 hours. A thoughtful response to a negative review converts undecided diners more effectively than a perfect rating with no responses. It shows you are listening and that you care.
Common Mistakes Restaurants Make on Google Maps
Getting listed is step one. Staying competitive requires avoiding the errors that quietly sink otherwise good profiles.
Inconsistent NAP data across platforms
NAP stands for Name, Address, Phone number. If your Google profile says “Joe’s Bistro” but Yelp says “Joe’s Bistro LLC” and your website says “Joe’s” – Google loses confidence in your business data. Consistency across every directory, social profile, and website is not optional. Audit your listings on Yelp, TripAdvisor, Facebook, and Apple Maps and make them match exactly.
Ignoring Google’s automatic edits
Google can update your business information based on user suggestions, third-party data, or its own confidence systems. This means your hours, phone number, or even your business name can change without your knowledge. Check your Google Business Profile dashboard at least once a week and look for the “Edits to review” notification.
Uploading a PDF menu instead of using the menu editor
This is one of the most common and most damaging mistakes. Google cannot read PDF files for search indexing. A PDF menu is invisible to the algorithm and useless for the Dishes panel. Type your menu items directly into the Google Business Profile menu editor.
Never posting Google Posts
Google Posts are short updates – promotions, events, new menu items, holiday hours – that appear directly on your Maps listing. Restaurants that post weekly get 5x more profile actions than those who post monthly, according to a 2025 BrightLocal study. Most restaurants never post at all, which is a free advantage sitting unused.
Treating the profile as set-and-forget
The majority of restaurant Google Business Profiles are never updated after the initial setup. Outdated menus, zero new photos, and unanswered reviews signal to Google – and to diners – that the business is inactive. Active profiles rank higher. Active profiles convert more clicks into covers.
What Ongoing Google Maps Management Actually Looks Like
Setting up your listing correctly is a one-time project. Maintaining it is a weekly discipline. Here is what restaurant owners who rank consistently in the local pack do differently:
- Upload 2–4 new photos every month
- Publish a Google Post every week (specials, events, holiday hours)
- Respond to every review within 48 hours
- Update hours for every holiday and special closure
- Check for unauthorized edits weekly
- Monitor the Q&A section and answer new questions
- Track listing performance (views, calls, direction requests) monthly in the Insights tab
For a solo owner or a small management team running a full dining room, this is often the first thing that falls off the list. That is where a dedicated marketing team pays for itself.
Need Help? RS360 Handles This for Miami Restaurants
If you followed every step in this guide, your restaurant is in a stronger position than most of your competitors on Google Maps. But if managing photos, reviews, posts, and profile edits every week is not realistic on top of running your kitchen and your floor – that is exactly what RS360 is built for.
We are a restaurant marketing agency based in Miami, FL. Our Google Business Profile management service covers initial setup and verification, ongoing photo strategy, weekly Google Posts, review monitoring and response, menu optimization, attribute audits, and monthly performance reporting. We work exclusively with restaurants, which means we understand the seasonal patterns, the competitive dynamics, and the specific searches that drive covers in South Florida.
Your Google Maps listing is not a directory entry – it is your most visible storefront. Treat it like one.
Talk to RS360 about managing your restaurant’s Google presence →
Frequently Asked Questions
Is it free to add a restaurant to Google Maps?
Yes, completely free. Creating a Google Business Profile, verifying your listing, uploading photos, and responding to reviews all cost nothing. Google offers paid advertising options (Google Ads, Local Services Ads) separately, but your organic listing and Maps presence is free to set up and maintain.
How long does it take for a restaurant to appear on Google Maps after adding it?
Postcard verification takes 5–7 business days to arrive, then your listing goes live within 24–48 hours of entering the code. If you qualify for phone, email, or video verification, the process can be completed the same day. Plan for 1–2 weeks total from your first login to a fully live listing.
Why doesn’t my restaurant show up on Google Maps even after I added it?
The most common causes are: the listing is unverified, the profile is incomplete (missing hours, phone number, or category), or the listing has been suspended due to a policy violation or suspected duplicate. Log into your Google Business Profile dashboard and look for alert banners. Also check that your business category is set to “Restaurant” or a specific cuisine type – generic or missing categories significantly reduce your search visibility.
How many Google reviews does a restaurant need to rank well on Google Maps?
BrightLocal’s 2025 research found that restaurants in the top three Map results averaged 47 more reviews than those in positions four through ten. Aim for at least 20–50 reviews with a rating of 4.2 stars or higher as a baseline. Volume matters, but so does recency – a steady stream of new reviews signals an active business and carries more weight than a one-time burst from years ago.
Can RS360 manage my restaurant’s Google Business Profile for me?
Yes. RS360 is a restaurant marketing agency based in Miami, FL that offers full Google Business Profile management as part of its local SEO services. That includes initial setup, photo strategy, weekly Google Posts, review response, menu optimization, and monthly reporting. Learn more at restaurantsuite360.com.